Written by JasonAt some point in every fly angler’s life they consider tying their own flies. For some, this happens right at the beginning. For others, it might be after years of fly fishing. If you’ve ever browsed through all the fly tying tools and materials at your local fly shop, it might seem a little intimidating (and expensive). But luckily, tenkara flies are simple and require only minimal tools and materials, making them an excellent gateway into the wonderful pursuit of fly tying. I’m often asked what tools are necessary to get started in fly tying so I thought it would be helpful to put together a basic list. These are only my recommendations. Others might suggest different tools but the ones I’m about to list will allow you to start immediately tying your own tenkara flies.
1. Vise
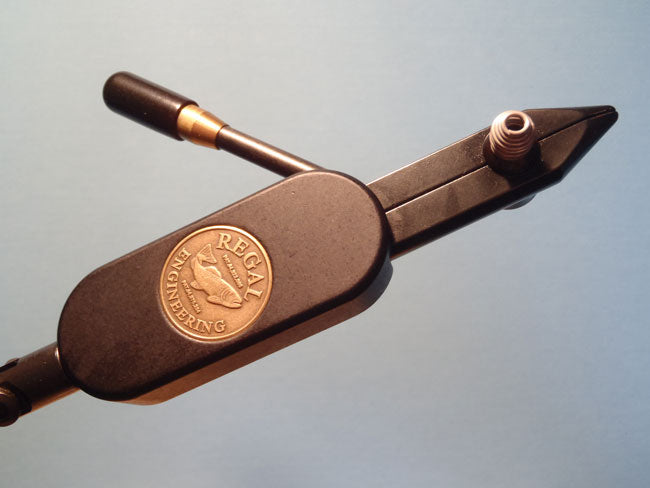
As the name implies, a vise holds the hook while you tie the fly. This will be the most expensive tool on the list, but is also the most important since it’s the one tool you’ll use every single time you tie a fly. You can pay anywhere from $20 to several hundred dollars for a vise. You don’t need to spend $300 on a fly tying vise for tenkara flies. But I recommend buying the best vise you can afford. Cheap vises will only lead to frustration, as they don’t hold the hook firmly. The last thing you want is the hook to start slipping around at a critical stage in the fly you’re tying (it always happens at the worst moment too). As a rule of thumb, I’d recommend spending somewhere around $100 on a vise if you’re serious about getting into tying. If you buy a $30 vise now and stick with tying, you will replace it later (trust me, you will). And then you’ve just thrown that $30 out the window when you could have put it toward a better vise right from the start (and avoided some headaches at your tying desk). Spend as much as you can. If you decide not to stick with fly tying, you can always sell your vise on eBay. When you start looking around, you’ll notice that vises come with either a clamp that attaches to the edge of a table, or a pedestal base, which sits on top of the table. I recommend pedestal vises because you can position them exactly where you want for more comfortable tying. But they’re usually more expensive. If you do get a pedestal vise, make sure the base is heavy. Put it on a flat surface and see how easy it is to wobble or tip over. A light base will not be stable when you’re tying and that is just as frustrating as the hook slipping at the wrong moment.
What you should expect to pay: $50 - $150
Recommended brands: Dynaking, HMH, Regal, Thompson
2. Bobbin
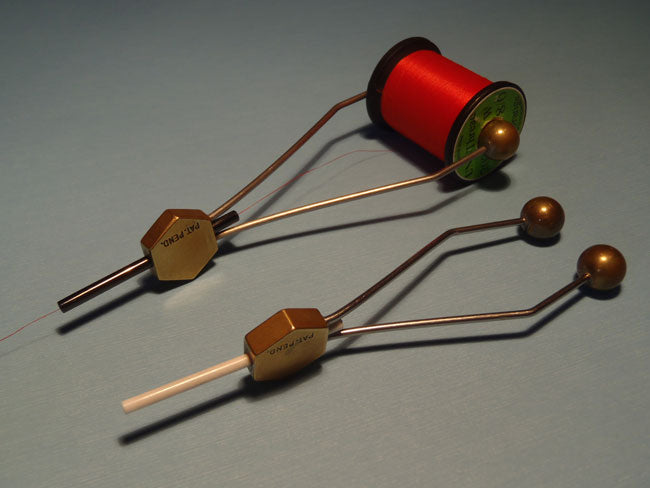
You probably already know that artificial flies are tied with thread. The bobbin is basically just a holder for the thread. Many have wire arms that you can bend in or out to adjust the tension. I recommend a ceramic bobbin since these tend to last longer and don’t fray the thread. While I’m only covering tools in this article, I want to make a quick note about thread. Many tenkara anglers use sewing thread rather than thread specifically made for fly tying. That’s fine, but if you decide to do that, make sure the spool will fit the bobbin. Most bobbins are a standard size but sewing thread comes in all different spool sizes. Many are too large or too small to fit the bobbin well. Look for sewing thread that comes on a spool that is 1 ¼” tall with a 1” diameter (this is the standard spool size for fly tying thread and will fit in your bobbin).
What you should expect to pay: $10 - $12
Recommended brands: Griffin, Dr. Slick, Umpqua
3. Scissors
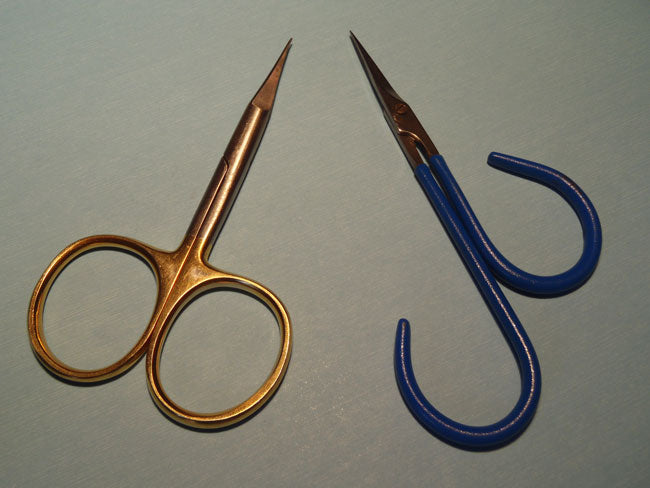
You probably could get away with the orange-handled Fiskars you have in the junk drawer, but scissors made specifically for fly tying will work a lot better and are worth the investment. I recommend getting ones with the finest tips possible. This will make snipping off materials cleanly much easier, and will produce a neater looking fly. Of all the tools on this list, scissors are only ones you’ll likely have to replace at some point. Scissors get dull and loosen up over time. If possible, I’d recommend getting scissors that have an adjustable screw so that when they do loosen up, you can tighten them. This will extend their useable life.
What you should expect to pay: $15 - $30
Recommended brands: Dr. Slick, Anvil
4. Hackle Pliers
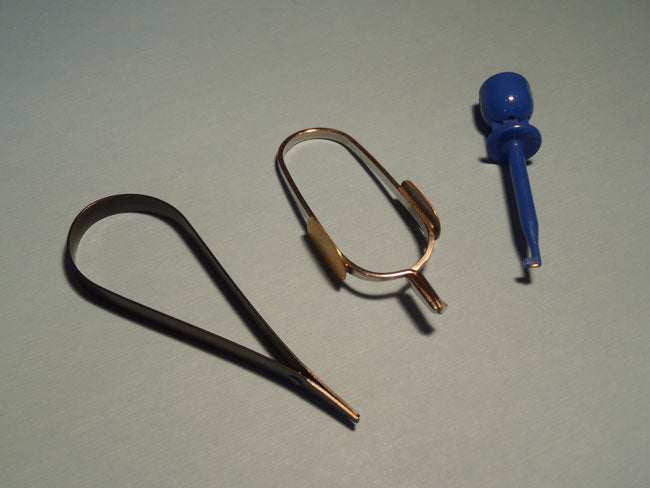
Hackle pliers hold various materials and make them easier to wrap. You could get away without them, but they’re so cheap, their convenience far outweighs their cost. There are many different styles, but I prefer the so-called “teardrop” style. Many come with a piece of rubber slid over one of the tips. This is to help prevent material from slipping out of the pliers while you’re wrapping them. After you’ve tied a little you’ll probably develop a preference for one style over another (or for using specific styles for different types of material). Luckily, adding a couple more to your fly tying tool kit won’t break the bank.
What you should expect to pay: $3 - $5
Recommend brands: Griffin, Tiemco, Dr. Slick
5. Whip Finisher
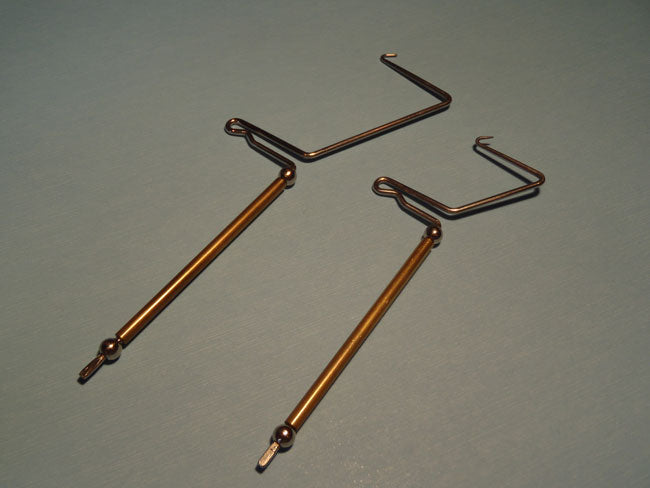
A whip finisher is a tool that you use to “finish” the fly. It essentially ties a knot that keeps the thread (and all of your hard work) from unraveling. Many tiers don’t use one. Instead, they tie a series of half hitches with their fingers. You can certainly do this, but it can be a little tricky for a beginning tier. Plus, rough skin can fray, or even cut thread. I recommend a whip finisher with a rigid arm rather than the types with the “springy” arm. They usually have a brass colored handle with a stainless steel arm (like the one in the picture). Whip finishers might look complicated at first but they’re actually very easy to use and there are plenty of video tutorials online. I prefer the larger sized whip finishers for tenkara flies since many are tied off at the back of the hook and the extra reach makes it easier to manipulate around the front of the fly.
What you should expect to pay: $8 - $15
Recommended brands: Matarelli (or similar style)
6. Head Cement (optional)
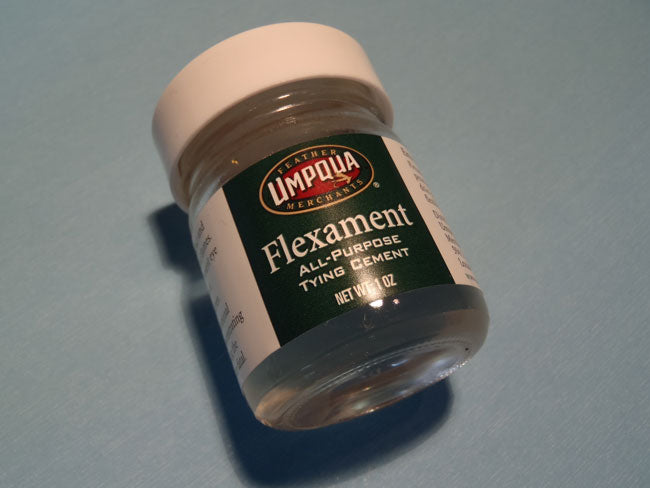
While not necessary, many tiers add a drop of head cement to their finished fly. This “glue” can increase the durability by locking the thread in place and keep it from unraveling. But many tenkara tiers don’t use head cement (I don’t). Again, this is something you might want to hold off on until you get a little tying experience under your belt.
What you should expect to pay: $5
Recommended brands: Dave’s Flexament
7. Bodkin (optional)
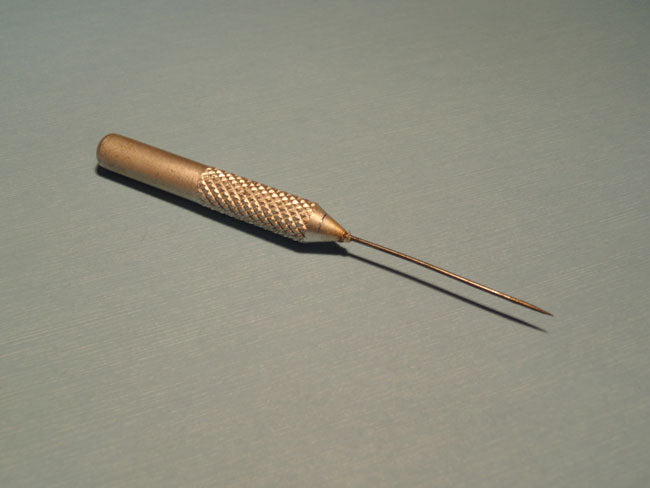
A bodkin is nothing more than a needle with a handle. You could easily make your own by sticking a sewing needle into a wine cork or wooden dowel. If you use head cement, you’ll need a bodkin to accurately apply it to the fly. But bodkins can also come in handy for other tasks like picking out small pieces of material. You might start without one and see if you feel a needle would be useful later.
What you should expect to pay: $0 - $5
Recommended brands: DIY or Any
Here is a shorter list you can print out and take to your local fly shop so you don’t forget anything. Any decent fly shop should have all of these items.- Vise. Recommended brands: Dynaking, HMH, Regal, Thompson
- Bobbin. Recommended brands: Griffin, Dr. Slick, Umpqua
- Scissors. Recommended brands: Dr. Slick, Anvil
- Hackle Pliers. Recommend brands: Griffin, Tiemco, Dr. Slick
- Whip Finisher. Recommended brands: Matarelli (or similar style)
- Head Cement (optional). Recommended brands: Dave’s Flexement
- Bodkin (optional). Recommended brands: Any
Of course, tools alone aren’t enough to tie a fly. You need materials too like thread, feathers, hooks, etc. Unfortunately, that’s beyond the scope of this article and really depends on which fly you’re tying. But armed with the above tools, you will be able to start tying tenkara flies right away. To get you started, here is a Dr. Ishigaki Kebari, which is a great pattern to tie as your first fly:
By now, you shouldn’t have sticker shock anymore, but in case you’re still on the fence, consider the advantages of tying your own flies:
- Saves money. Some might debate if tying your own flies actually saves money or not. It’s easy to go overboard with a lot of expensive tools and exotic materials but if you keep it simple, you can tie your own flies for a fraction of what they cost in a fly shop. And if you’re a new fly angler, chances are you’re going to lose a fair number of flies on trees, and rocks. It will be much cheaper to replace them by tying your own.
- You can make any pattern you want. If you don’t tie, you’re limited to what flies are available in the fly shop. But if you tie your own, you can essentially make any pattern you want. It’s a great creative outlet that will allow you to stretch your imagination and experiment. To me, fly tying is a form of self expression.
- It’s fun and rewarding. People often say that one of the most rewarding things in fly fishing is to catch a fish on a fly you tied yourself. Making your own flies is not only fun, but adds another dimension to your engagement in the sport and certainly carries its own rewards.
